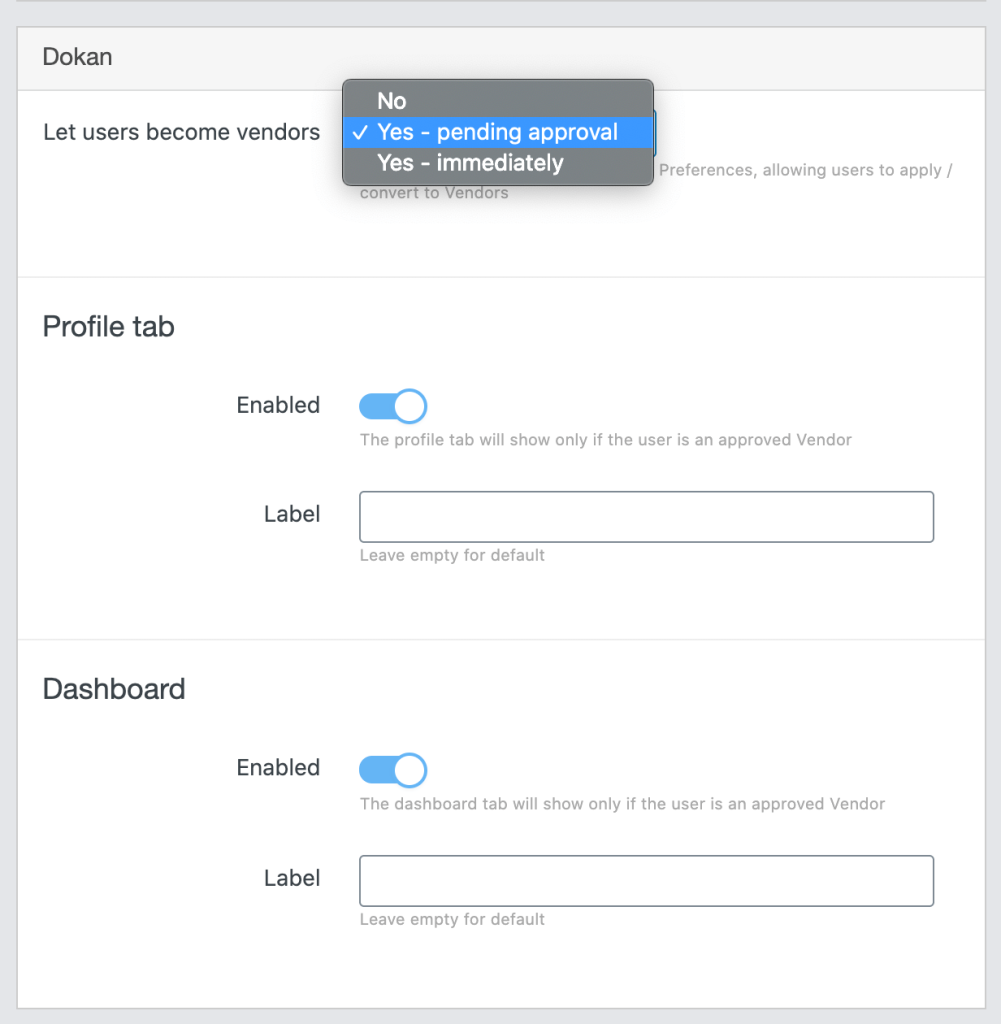
With the help of the PeepSo Monetization: WooCommerce, Dokan and Product Vendors integration plugin, you can enable your site users to become a Vendor. The settings that allow you to send a request to become a Vendor can be found in WP Admin -> PeepSo -> Configuration -> WooCommerce -> Dokan section.

In the integration settings you will find: #
- Let users become vendors – select one of the available options to enable or disable the ability to send a request to become a Vendor. If you select one of the options to allow sending the request, an additional section will appear in the user’s profile preferences. To find it, go to Profile page -> Preferences -> Vendor Application section and use Apply to become a vendor button.

After sending the request, depending on whether we have chosen to accept it in the integration settings, we have to accept it or not in the third-party Dokan plugin settings. You can find them in WP Admin -> Dokan -> Vendors.
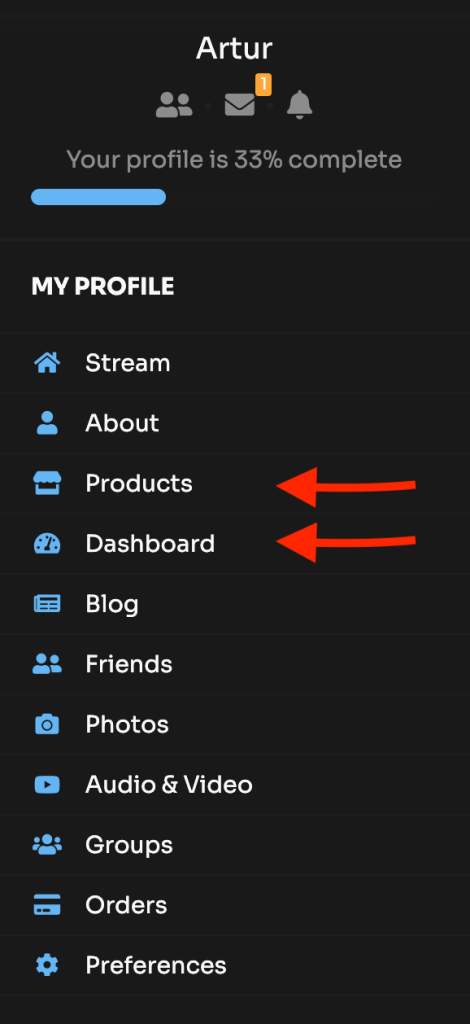
- Profile tab – use the Enabled switch to make an additional Products tab appear in the PeepSo profile navigation when you accept the request to become a Vendor. You can also change its name by entering it in the Label position.
- Dashboard – use the Enabled switch so that when you accept the request to become a Vendor, an additional Dashboard tab appears in the PeepSo profile navigation. You can also rename it by entering it in the Label position.


